NICU Nurse, Mama Heart. Here for every tiny step.
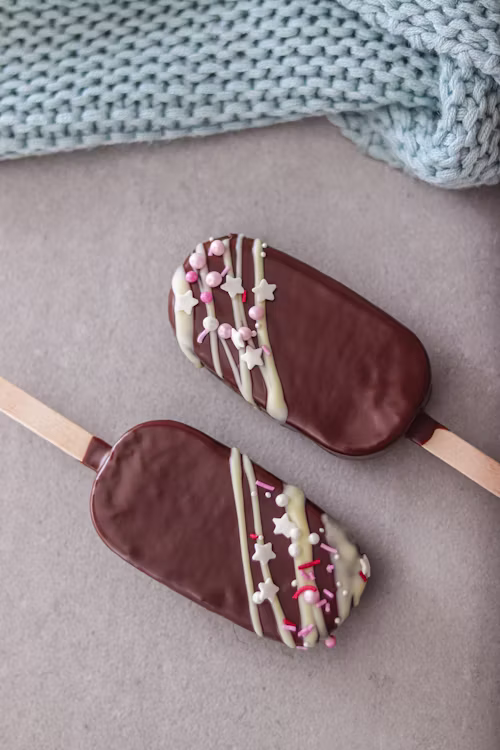
How to Make Cake Pops Using a Silicone Mold
Cake pops are my kids most requested party treat! Any birthday, cookout, holiday, graduation party, or family get-together, they’re asking if I can make cake pops. And honestly, they’re so simple, versatile and fun! Using a silicone popsicle mold creates perfectly shaped cake pops every time with minimal effort. They are always a huge hit!
Whether you’re making classic vanilla cake pops or experimenting with fun flavors like cookies and cream or red velvet, this recipe is beginner-friendly and consistently delicious.
Why You’ll Love This Recipe
- Perfect uniform shape every time
- No messy rolling by hand
- Great for beginners
- Easy to decorate
- Perfect for parties and gifting
- Freeze beautifully
- Endless flavor combinations
Supplies You’ll Need
- Silicone popsicle mold (like the one shown)
- Cake pop or popsicle sticks
- Large mixing bowl
- Spoon or cookie scoop
- Microwave-safe bowl
- Parchment paper
- Cooling rack or cake pop stand
Ingredients
Cake
One 9×13 baked cake (or one boxed cake mix prepared according to package directions)
Choose your favorite flavor:
- Vanilla
- Chocolate
- Funfetti
- Strawberry
- Lemon
- Red Velvet
- Carrot Cake
- Spice Cake
- Confetti
- White Cake
Frosting
½–¾ cup frosting
Use just enough for the mixture to hold together.
Flavor ideas:
- Vanilla buttercream
- Chocolate frosting
- Cream cheese frosting
- Strawberry frosting
- Cookies & Cream frosting
- Lemon frosting
Coating
16–24 ounces melting wafers or candy melts
Popular colors:
- White
- Milk Chocolate
- Dark Chocolate
- Colored candy melts
Optional Decorations
- Sprinkles
- Crushed Oreos
- Mini chocolate chips
- Drizzled chocolate
- Crushed freeze-dried strawberries
- Chopped nuts
- Colored sanding sugar
- Edible glitter
- Cookie crumbs
Step 1: Bake the Cake
Bake your cake according to package directions or your favorite homemade recipe.
Allow it to cool completely.
Tip: Warm cake creates a sticky mixture that’s harder to work with.
Step 2: Crumble the Cake
Break the cooled cake into fine crumbs using your hands or a mixer.
There should be no large chunks remaining.
Step 3: Mix in Frosting
Start with ½ cup frosting.
Mix until the texture resembles soft cookie dough.
If needed, add frosting one tablespoon at a time.
The mixture should hold together when squeezed but shouldn’t feel overly wet.
Step 4: Fill the Silicone Mold

Click the image or here for the link
Press the cake mixture firmly into each cavity.
Use a spoon or offset spatula to smooth the tops.
Insert a cake pop stick into each mold opening.
Close the mold securely if your mold includes a top piece.
Freeze for 30–60 minutes, or refrigerate for about 2 hours until firm.
Step 5: Melt the Chocolate
Melt candy melts according to package instructions.
Stir every 30 seconds until completely smooth.
Tip: If the chocolate seems too thick, stir in a teaspoon of vegetable oil to thin it slightly.
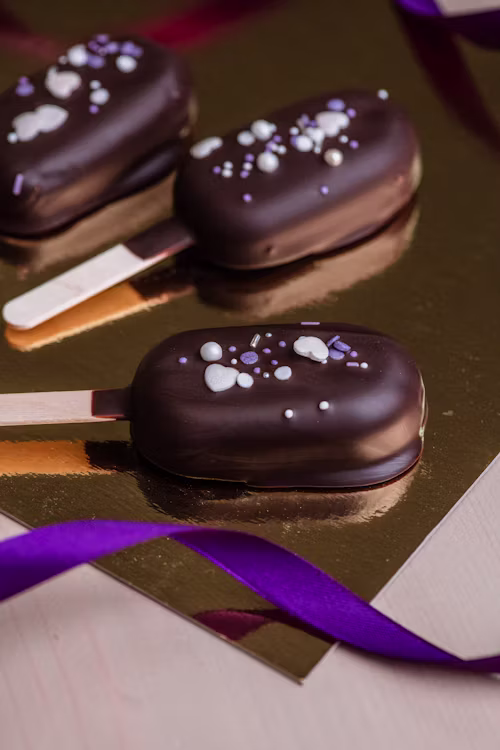
Step 6: Dip the Cake Pops
Remove cake pops from the mold.
Dip each pop completely into melted chocolate.
Tap gently on the side of the bowl to remove excess coating.
Avoid stirring or swirling the cake pop while dipping.
Step 7: Decorate
Before the coating hardens, decorate however you’d like.
Ideas include:
- Rainbow sprinkles
- Chocolate drizzle
- Crushed cookies
- Mini marshmallows
- Crushed peppermint
- Gold sprinkles
- Coconut flakes
- Freeze-dried fruit
- Colored sugar
Step 8: Dry
Place upright in a cake pop stand or upside down on parchment paper until set.
If you’re looking for other kid-approved ideas for a stress-free Fourth of July holiday, check out essential tips here!
Most Popular Cake Pop Flavor Combinations
Birthday Cake
- Funfetti cake
- Vanilla frosting
- White candy coating
- Rainbow sprinkles
Chocolate Lovers
- Chocolate cake
- Chocolate frosting
- Milk chocolate coating
- Chocolate drizzle
Cookies & Cream
- White cake
- Crushed Oreos
- Vanilla frosting
- White chocolate coating
- Oreo crumbs
- *No-bake option: Crush a family pack of Oreos in a food processor and mix with a block of room-temp cream cheese. (No need for cake mix or frosting.) Freeze, dip, and decorate just like you would the cake pops*
Strawberry Shortcake
- Strawberry cake
- Vanilla frosting
- White chocolate coating
- Freeze-dried strawberries
Lemon
- Lemon cake
- Cream cheese frosting
- White coating
- Yellow sprinkles
Red Velvet
- Red velvet cake
- Cream cheese frosting
- White chocolate coating
Salted Caramel
- Vanilla cake
- Caramel frosting
- Milk chocolate coating
- Sea salt flakes
Peanut Butter Chocolate
- Chocolate cake
- Peanut butter frosting
- Chocolate coating

Decorating Ideas by Occasion
Birthday
- Rainbow sprinkles
- Bright candy melts
Baby Shower
- Pastel colors
- Gold drizzle
Wedding
- White coating
- Pearl sprinkles
Graduation
- School colors
Halloween
- Orange and black drizzle
Christmas
- Red, green, and white sprinkles
Fourth of July
- Red, white, and blue coating + sprinkles

Click the image or here for the link
Valentine’s Day
- Pink chocolate
- Heart sprinkles
Easter
- Pastel candy melts

Storage
Store finished cake pops:
Room Temperature
2–3 days in an airtight container.
Refrigerator
Up to one week.
Freezer
Up to 3 months.
Thaw overnight in the refrigerator before serving.

Click the image or here for the link
Tips for Perfect Cake Pops
- Don’t add too much frosting.
- Chill before dipping.
- Use good-quality candy melts.
- Thin thick chocolate if needed.
- Tap gently to remove excess coating.
- Decorate immediately before the coating sets.
- Allow cake to cool completely before mixing.
Frequently Asked Questions
Can I use homemade cake?
Absolutely! Homemade cake works just as well as boxed cake mix.
Why are my cake pops cracking?
This usually happens when there’s a large temperature difference between the chilled cake pops and the warm coating. Let the cake pops sit at room temperature for a few minutes before dipping.
Can I freeze cake pops?
Yes! Freeze decorated cake pops in an airtight container for up to 3 months.
What if my mixture is too soft?
Refrigerate it for 20–30 minutes before filling the mold.

Making cake pops with a silicone mold is one of the easiest ways to make fun, creative, festive and fun treats for any occasion. The mold gives every cake pop a uniform shape, making them ideal for birthdays, weddings, baby showers, holidays, gifts, or any family and friend gathering.
With endless cake flavors, frosting combinations, and decorations to choose from, you’ll never run out of creative ways to customize this recipe. Hope you enjoy making and eating these as much as our family does!
Related Keywords: homemade cake pops, cake pop recipe, silicone cake pop mold, cake pop ideas, easy cake pops, chocolate cake pops, birthday cake pops, cookies and cream cake pops
Affiliate disclosure: This post contains affiliate links, which means I may earn a small commission- at no extra cost to you- if you choose to make a purchase through them. I only recommend products and services I genuinely use or believe may be helpful.